[日本語] / English
Related Hack -> Make the AVRISP mkII Clone from Arduino UNO Rev.3
I tested and confirmed function of this hack on only “avrdude ver 6.2”
1.Introduction
It will be able to make the AVRISP mkII Clone if you a little modifying to Arduino UNO / Leonardo / Micro PCB.
Below is an article on making Arduino Leonardo / Micro into AVRISP mkII clone.
2.How about a little modifying
- Burn the firmware of AVRISP-mak2 clone to ATmega32U4 of Arduino Leonardo / Micro. And it works as AVR-programmer.
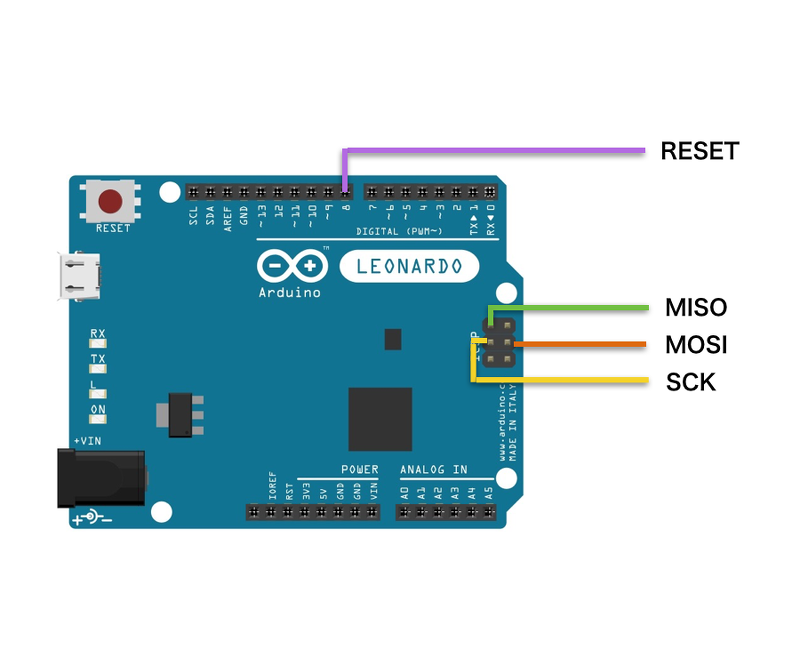
- The signals (RESET, SCK, MISO, MOSI) required for ISP-programming can be derived from D8 and ICSP pins.
- The signals (RESET, TPIDATA, TPICLK) required for TPI-programming can be derived from pins(D8, D0, D1) and TX-LED line (inner of PCB).
3.Prepare these
- Arduino Leonardo Rev.3 / Micro or clones.
- Windows PC. But Windows10 is not supported.
- another AVR-Programmer or Arduino UNO (ArduinoISP sketch running)
- “Flip” tool
DFU-Programming software。Download it below URL of Atmel’s Flip-webpage. And install it.
http://www.atmel.com/tools/FLIP.aspx
“Flip” dose not run under the Windows10. - DFU loader firmware package.
megaUSB_DFU_Bootloaders_2e.zip
After decompressing, the megaUSB_DFU_Bootloaders_2 folder is appeared. - AVRISP mkII clone firmware
AVRISP-MKII_ATmega32u4.zip After decompressing, AVRISP-MKII_ATmega32u4.hex is appeared.
4.Modifying the PCB to get “TPICLK” signal.
- Solder the via (marked by red arrow) and unused pin with a thin wire.
Click on the image to enlarge fig. - This via is connected to PD5 of ATmega32U4.
Arduino Leonardo |
Arduino Micro |
 |
 |
| Wiring from the via (marked red arrow) to the pin in IOREF rightside. | Wiring from the via (marked red arrow) to the pin in A5 rightside. |
5.Burn the DFU-loader and Start
- Do the work without connecting the USB connector to Arduino Leonardo / Micro.
- Connect the AVR-Programmer to Arduino Leonardo / Micro and start the AVR-Programmer software.
- Erase flash memory of Arduino Leonardo / Micro.
- Set Fuse-Bits as below.
lowFuse 0xFF , highFuse 0xD9 ,extendedFuse 0xC3
Caution: When if you incorrect the Fuse-Bits settings, your Leonardo/Micro become to brick. - Burn the ATMega32U4-usbdevice_dfu-1_0_0.hex (include in megaUSB_DFU_Bootloaders_2 folder ) to your Leonardo/Micro.
- Set Lock-Bits 0xEF
- Detach AVR-Programmer.
- From here, connect a USB connector to your Leonardo / Micro and connect it to a PC.
- The USB device “ATMEL ATm32U4DFU” appears on your PC.
- If the device driver is required, specify C: \ Program Files \ Atmel \ Flip 3.4.7 \ usb \ . and install the driver.
6.Burn the AVRISP mkII clone firmware
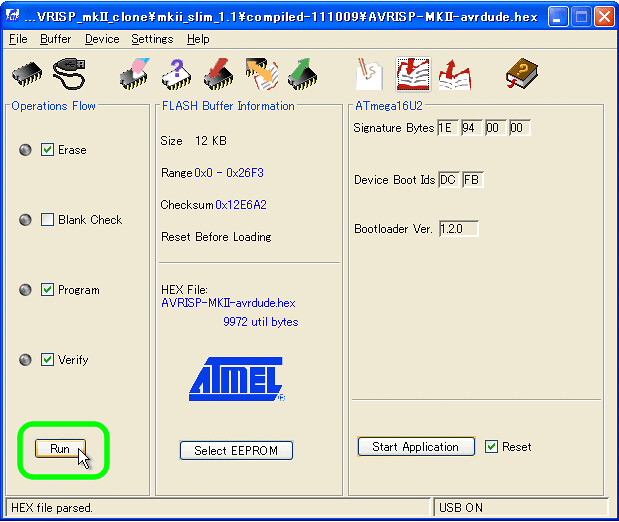
- Launch the Flip tool and burn the AVRISP mkII clone firmware.
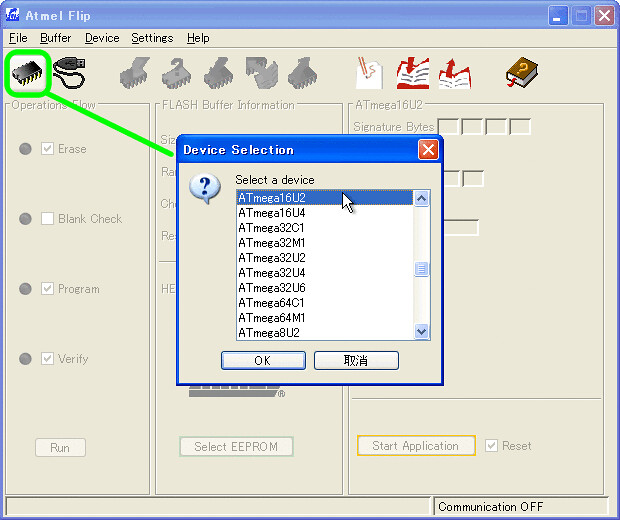
Figures 2 to 5 show how to write other firmware to ATmega16u2.- Select ATmega32U4 (Fig.3)
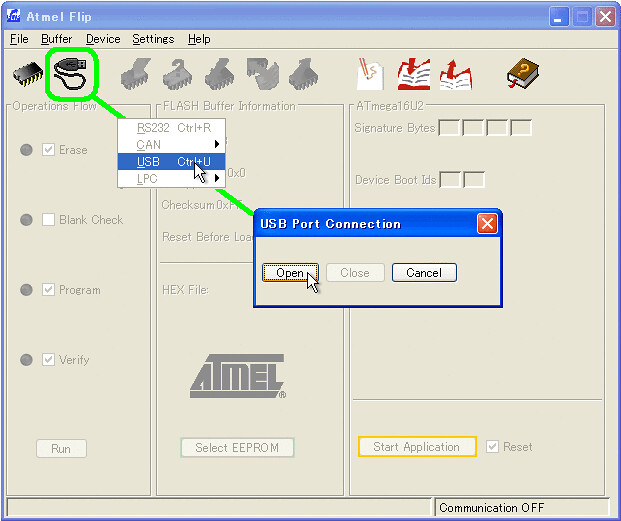
- Open with USB connection (Fig.4)
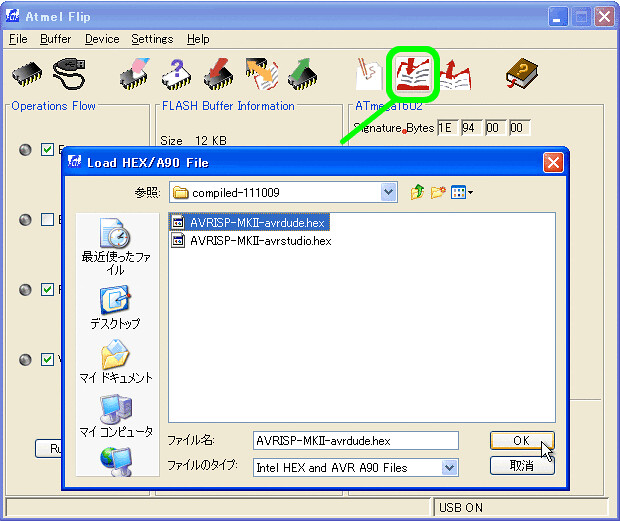
- Load AVRISP-MKII_ATmega32u4.hex (Fig.5)
- Click [RUN] = Burn (Fig.6)
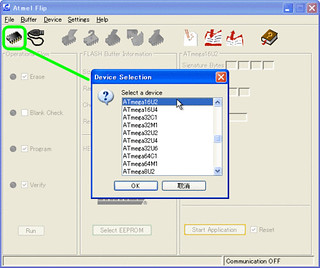
Fig.3
Fig.4
Fig.5
Fig.6
7.Recognition of AVRISP mkII
- Disconnect the USB cable and reconnect it.
- When reconnecting, the USB device ATMEL AVRISP mk II appears.
- If the device driver is required, install “libusb” generic USB driver. How to install it (google search)
- Note: If you push the “RESET” button, your Leonardo / Micro at any given time will be the USB device “ATMEL ATm32U4DFU” the transition to the DFU mode immediately.
When you use this AVRISPmkII clone, you must not push the “RESET” button.
8.Arduino Leonardo / Micro AVRISP mkII signals
| TPI signals | ISP signals | ISP / TPI signals |
 |
 |
 |
9.How to return to the original
- Connect the AVR-Programmer to your Leonardo / Micro.
- Launch the Arduino IDE.
- Select Board “Leonardo” or “Micro”.
- Burn the Bootloader.
It will return to the original Arduino Leonardo / Micro.
upload 2017.01.02 (c) by Kimio Kosaka

