I found the method to burn the bootloader by “Arduino Diecimila” itself without external AVR-writer.
And I reported it as below on July 27 2008.
My web site Burning the Bootloader without external AVR-Writer
arduino.cc Forum Burning the Bootloader without AVR-Writer
arduino.cc playground Turn your Diecimila into an AVR Writer
It is called “FTDI-Bitbang method”.
Today , I tried the method to burn the bootloader by “Arduino UNO Rev.3” itself, just like “FTDI-Bitbang method”.
I report about this method as below.
1. Arduino UNO Rev.3
This method is available in “Arduino UNO Rev.3” and etc equipped with Atmega16U2 usb-serial.
2. Softwears
- Windows
This method is running on Windows environment. But Windows10 is not supported. - Flip-tool
“Flip” is writing-tool for ATmega16U2. Downloading from the Atmel’s website.
http://www.atmel.com/tools/FLIP.aspx
“Flip” dose not run under the Windows10. - AVRISPmk2-Clone firmware
AVRISP-MKII_ATmega16u2.zip
Extract AVRISP-MKII_ATmega16u2.hex from this .zip - usbserial
“usbserial” is a file to make ATmega16u2 become usbserial-converter . It is attached to “Arduino IDE”. There is it in the folder as below.
C:\Program Files\Arduino\hardware\arduino\avr\firmwares\atmegaxxu2\UNO-dfu_and_usbserial_combined.hex
3. Add header-pins
There are four pads written as JP2 near the ATmega16U2 on a UNO PCB. (These pads are connected to the I/O pins of ATmega16U2.)
Remove the solder of these pads and insert a pin-header. And soldering it. (Fig.1)
 Fig.1 |
4. AVRISPmk2-Clone
- Set the short plug
Short the No.5 with No.6 pins on ICSP of ATmega16U2.(Fig.2) Fig.2
Fig.2 - Connect to USB
Connect Arduino UNO to USB port. And after, remove the short-plug 5 with 6 on ICSP of ATmega16U2.
ATmega16U2 run on DFU-mode. - Install Driver
Windows detect new USB device “Atmel Corp IOUSB Host Device”(or ATmega16U2 DFU). and install drivers.
There are drives file in the folder as below.
C:\Program Files\Atmel\Flip 3.4.7\usb\ - Write “AVRISP-MKII_130303_toggle_driver.hex”
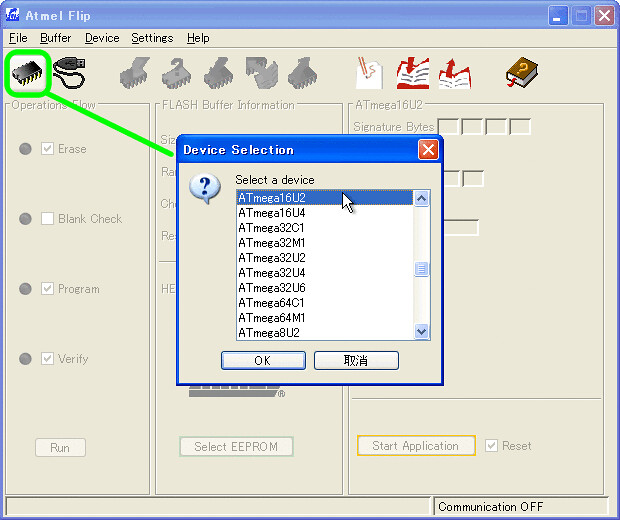
(1)Run the Flip-tool
(2)Select device ATmega16U2.(Fig.3)
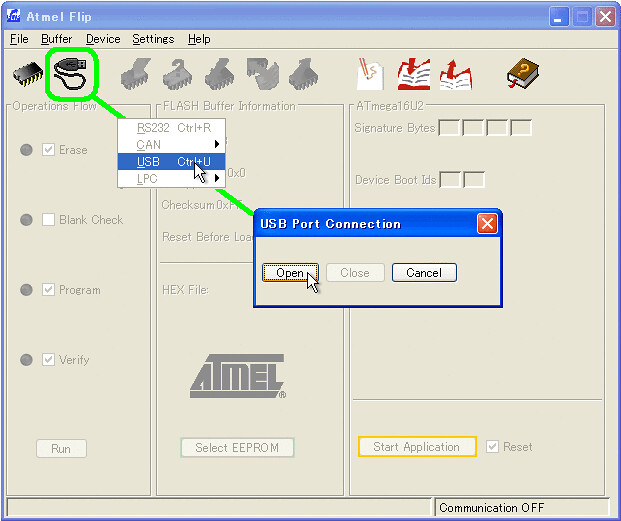
(3)Open the USB port. (Fig.4)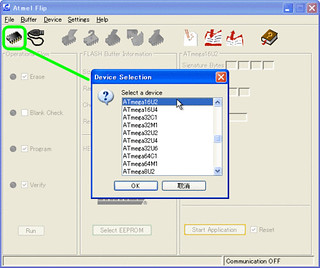
Fig.3
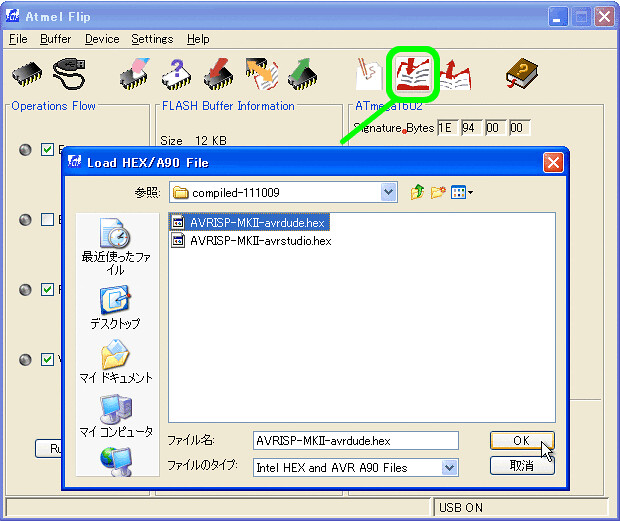
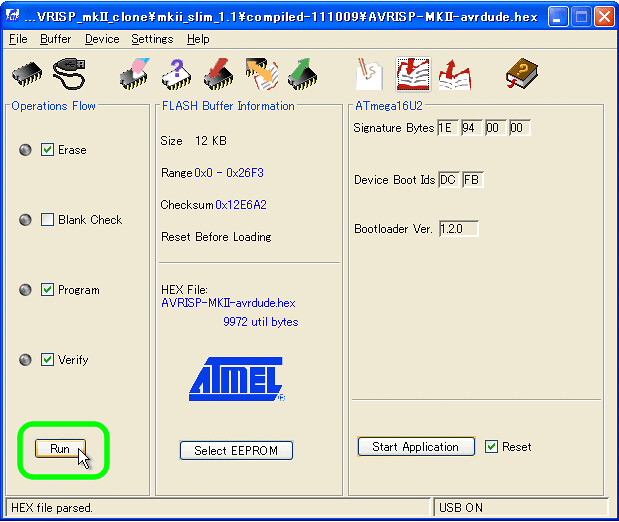
Fig.4(4)Load the “AVRISP-MKII_ATmega16u2.hex” file. (Fig.5)
(in Fig. AVRISP-MKII-avrdude.hex is old ver.)
(5)Click [Run] botton to write. (Fig.6)
Fig.5
Fig.6
5. Burn the bootloader
- Re-connect
Re-connect Arduino UNO without the short plug 5-6pin on ICSP of ATmega16U2.
Windows detect new USB device “ATMEL AVRISP mkII”.
If the device driver is required, install “libusb” generic USB driver. How to install it (google search) - Start the “Arduino IDE” and set as belows.
(1) Tool -> Board -> Arduino UNO (Fig.6)
(2) Tool -> Programmer -> AVRISP mkII (Fig.7)
Fig.6
Fig.7 - Wiring
Connect ATmega16U2-ICSP with Arduino UNO-ICSP by wires. (Fig.8)
Fig.8 - Burn the bootloader of UNO ATmega328P
Tool -> Burn Bootloader (Fig.9)
Fig.9

6. Return to usbserial
- Run the DFU-mode on ATmega16U2.
- Start the Flip-tool.
- Write the “UNO-dfu_and_usbserial_combined.hex”
7. Another hack
Arduino UNO Rev.3 / Leonardo Rev.3 / Maicro becomes AVR Programmer AVRISP mkII Clone (include TPI mode).
- Make the AVRISP mkII Clone from Arduino UNO Rev.3
- Make the AVRISP mkII Clone from Arduino Leonardo Rev.3 / Maicro
Update 2016.12.24 adapted present environment
Upload 2013.12.01 Kimio kosaka
