[ Japanese / English ]
Attention
This develop environment is can’t work on Arduino IDE 1.8.10 later.
So, you must use Arduino IDE 1.8.9 or less.
This project is to make the the ATtiny10 development environment on Arduino IDE
This dev environment is able to run on mac0S, Windows, x86-Linux, ARM-Linux.(require Arduino IDE 1.8.5 … 1.8.9)
It is using the TPI programmer sketch “ATtiny4_5_9_10_20_40Programmer_2” on an Arduino UNO. The original sckech “ATtiny4_5_9_10_20_40Programmer” was written by Keri DuPrey.
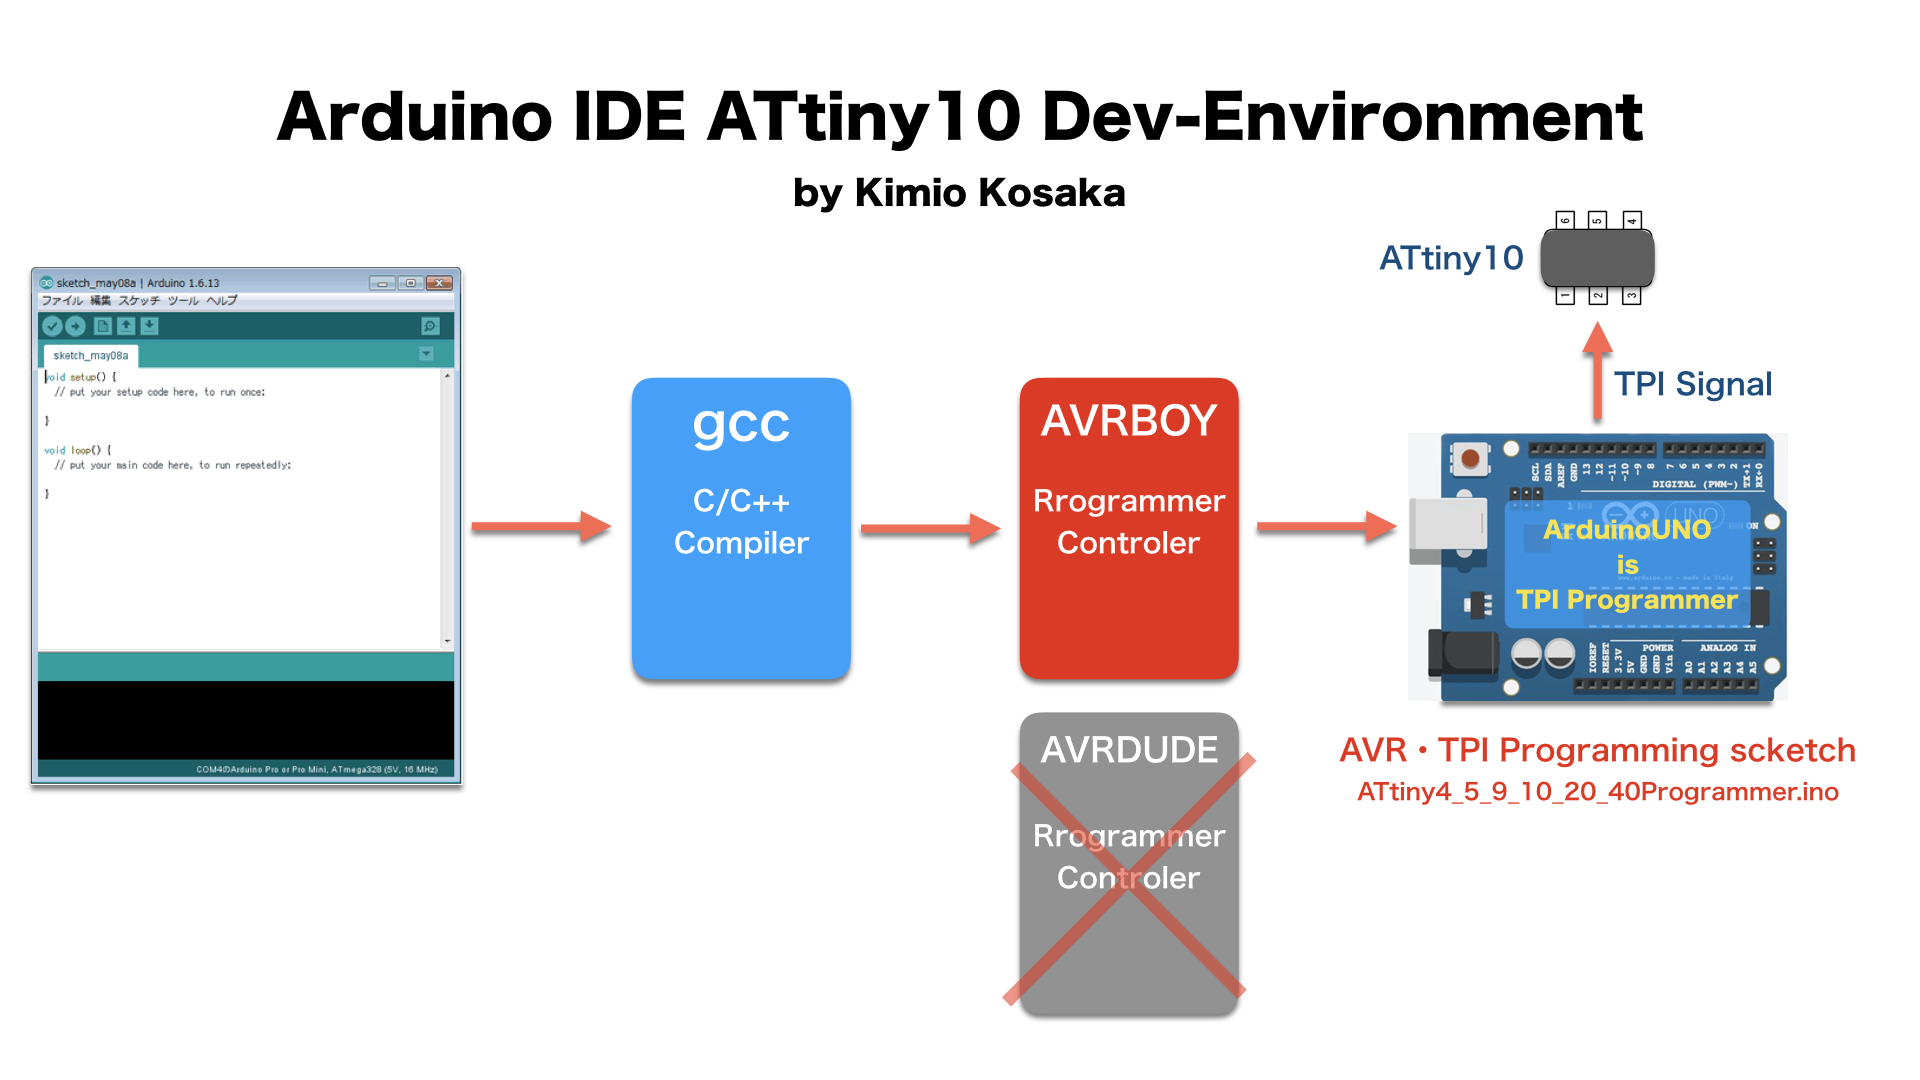 fig.1 fig.1 |
What is the “AVRBOY”
“ATtiny4_5_9_10_20_40Programmer” does not work with the standard programmer control tool “AVRDUDE” incorporated in Arduino IDE.
So I made special control tool “AVRBOY” for this project.
This made it possible to use “ATtiny4_5_9_10_20_40Programmer” on Arduino IDE.
Installation and Verification
- Preparation
- Board and Parts
Arduino UNO, ATtiny10 (/w breakout), Resisters 220 x4, Resister 1K, LED, Breadboard, Jump wires. fig.2 fig.2
fig.2
- Board and Parts
- Wiring
- How to output TPI signals. fig.3
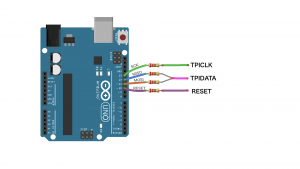 fig.3
fig.3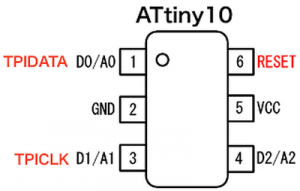
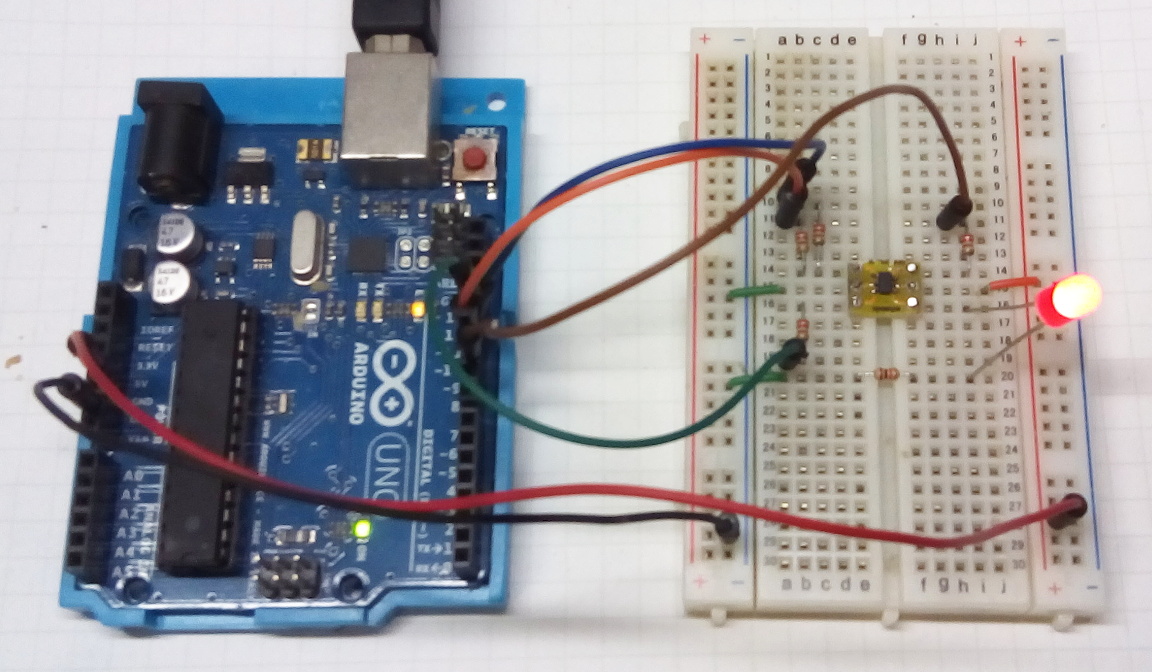
- The circuit for verification of compile, upload and run. fig.4
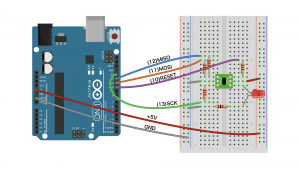 fig.4
fig.4
- How to output TPI signals. fig.3
- Download TPI programming sketch and Upload
- Download this zip file “ATtiny4_5_9_10_20_40Programmer_2.zip” and extract.
I modified the “ATtiny4_5_9_10_20_40Programmer”, for control more easier by AVRBOY. - Start your Arduino IDE
- Upload this sketch to your Arduino UNO.
- Download this zip file “ATtiny4_5_9_10_20_40Programmer_2.zip” and extract.
- Build environment
- Copy the following “package..json” URL.
.
https://kimio-kosaka.github.io/bitDuino10-arduinoTPI/package_bitDuino10-arduinoTPI_index.json
. - Start your Arduino IDE
- Click and go
[Windows, Linux]: “File”->”Preferences” ->”Additional Boards Manager URLs” .
[mac]: “Arduino”->”Preferences” ->”Additional Boards Manager URLs” . - Paste “package..json” URL into “Additional Boards Manager URLs” text-box. fig.5
- Click “OK”, close the “Preferences”.
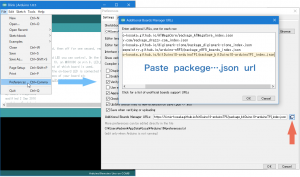 fig.5
fig.5 - Click and go “Tools”->”Board”->”Board Manager…”
- Search “bitduino”. and Install “bitDuino10-aTPI” . fig.6
- Close the “Boards Manager”.
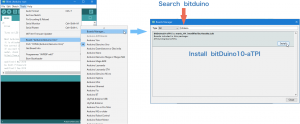 fig.6
fig.6 - “Tools”->”Board”-> Select “ATtiny10(bitDuino10-arduinoTPI)”. fig.7
“Tools”->”Port” -> Select conected Arduino UNO’s serialport.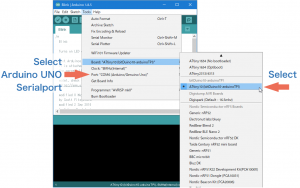 fig.7
fig.7
- Copy the following “package..json” URL.
- Verification
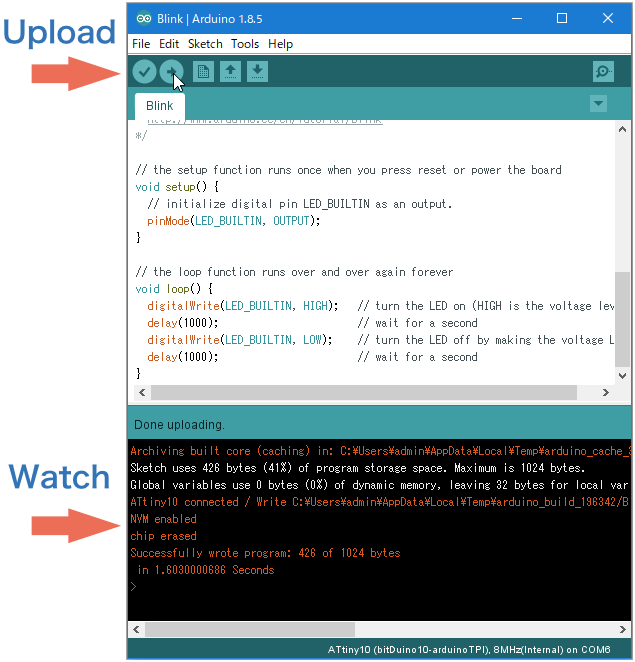
- Open the sketch “01.Basics / Blink”.
- Click the “Upload” button.
- Please watch to status area of your Arduino IDE. fig.8
- After uploading, start blinking the LED.
- ATtiny10’s pin-assignment of this dev environment. see fig.9
 fig.8
fig.8
LED_BUILTIN is D2
fig.9
- About “bitDuino10-arduinoTPI”
The bitDuino is dev environment of ATtiny10 and ATtiny13 for Arduino IDE 1.0.6 or before. It’s made by @maris_HY, github repository is here.
I separated bitDuino to bitDuino10 and bitDuino13. And I rebuilt these for able to use on Arduino IDE 1.8.x.
On this project, I added TPI programming tool and configuration files to the bitDuino10. I named it “bitDuino10-arduinoTPI”. - Source Code
- “bitDuino10-arduinoTPI” configuration files for Arduino IDE
https://github.com/kimio-kosaka/bitDuino10-arduinoTPI - “AVRBOY” control tool for the TPI programmer (go-lang source) and
“ATtiny4_5_9_10_20_40Programmer_2.ino” the TPI programmer scketch for Arduino UNO etc.
https://github.com/kimio-kosaka/avrboy
- “bitDuino10-arduinoTPI” configuration files for Arduino IDE
- Special thanks
.
Keri DuPrey
..Author of ATtiny4_5_9_10_20_40Programmer
.
Junk + Arduino =
..I was inspired by this web page, and started this project.


| History | ||
| May.04.2018 | @Kimio_Kosaka | Upload |
